How to Decoupage with Saran Wrap
Let’s have fun with napkin decoupage today! Love what little paper napkin can bring into any project. There are so many techniques on decoupaging that I shared on my blog so make sure to check it out. Today I like to show you no Mod-Podge napkin decoupage ..yes you read me right …NO Mod-Podge napkin decoupage. You may ask how can you do it? Its easy ..let’s use Saran Wrap to decoupage. Learn with me how to wrinkle free napkin decoupage on a fabric. I have this roll of fabric from Dollar Tree that I would love to work with today. Perfect napkins decoupage for the beginners.
Supplies needed to decoupage on fabric with Saran Wrap
- paper napkin of your choice
- Saran Wrap
- frame OR embroidery hoop
- piece of fabric
- iron
- parchment paper
Let’s decoupage with Saran Wrap!
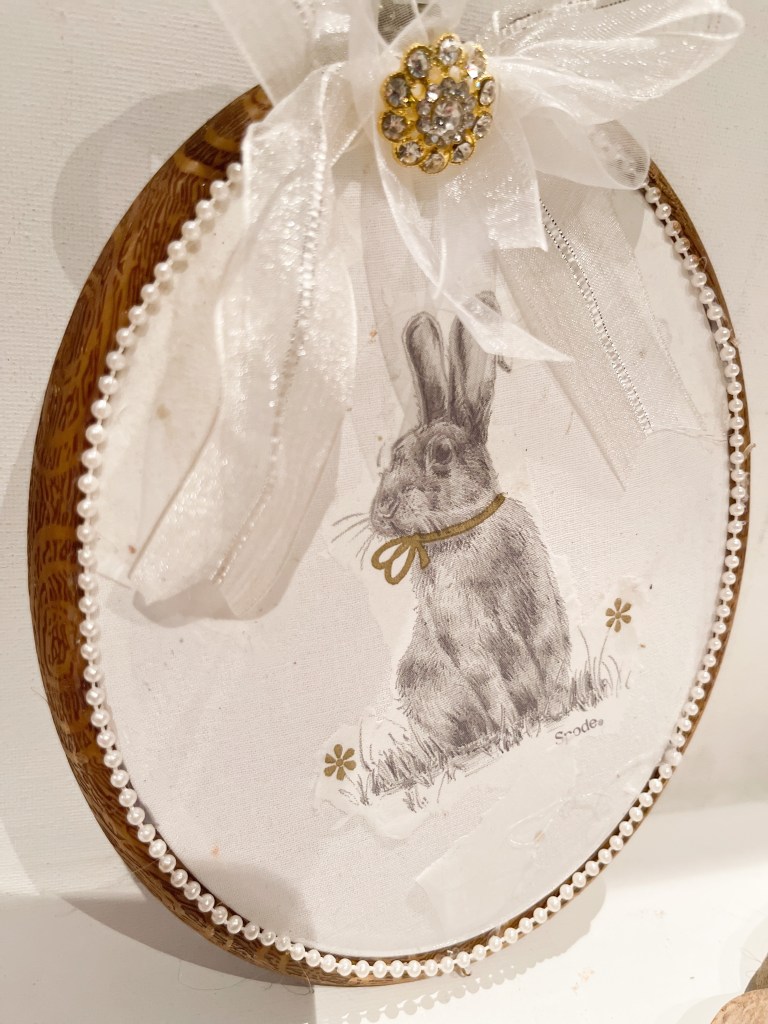
My supplies are here and I am ready to have fun. Making a decision which napkin to use out of my stock is not easy but I think my oval embroidery hoop with wooden like trim will look awesome with that vintage like bunny. Grab your napkin bundle from my store while supply last HERE

Napkin is chosen my linen like fabric from Dollar Tree is set and I am ready to have fun. Let’s explore how to decoupage wrinkle free on your canvas or fabric. To tell you the truth I dont mind them but hey let’s explore all. Are you excited about no Mod- Podge napkin decoupage technique as much as I am ?


Make sure to check my post HERE on tips and tricks in napkin decoupage. Super helpful post
Before whole napkin decoupage fun begins we need to start from basics that means to separate a ply’s. Paper napkins come with 2 plies at least. Make sure to save them ! Napkin ply’s are so much fun to craft with too. I also have a blog post about crafting with ply’s HERE


You could decoupage whole piece of your napkin on the fabric that fits your surface but hey I am on the mission to create some vintage ripped look to my project. My goal was to decoupage that bunny and pieces of it. Water is so helpful in that process for sure . As you can see i used my small paintbrush to outline my bunny with it . See pictures below
Prep your napkin


All is outlined and now it is time to gently separate your image. Yes you could cut all out much closer to bunny or any other object but as I mentioned I am on the mission to really create a vintage look with additional pieces from my napkin

As I mentioned before no Mod Podge is needed here to decoupage napkin. Let’s bring small piece of Saran wrap and roughly cut our napkin shape. You dont need to be exact just about. All will work itself out later.

All is ready! Let’s decoupage this napkin wrinkle free.

Just because I am need my fabric to fit my embroidery hoop measuring will be great.
Let’s decoupage!

Bring a piece of your parchment paper , set your iron to medium high heat and lets begin to decoupage with heat! How fun this napkin decoupage technique is! As I said napkin decoupage for beginners. Let the heat do the work for you.


Lift up your parchment paper here and there to make sure napkin is decoupaged to your fabric before turning your iron off

How beautiful and seamless this napkin decoupage is ! Perfection ..no wrinkle decoupage . You could stop there but I am going to repeat this technique all around my embroidery hoop to have that vintage look

Make sure to check this whole process in the video below on my YouTube channel. SUBSCRIBE AS YOU ARE THERE!
Added a little pearl trim that you can get HERE , simple sheer bow and of course some BLING that you can get HERE

HOW GORGEOUS IS THIS PROJECT! Absolutely love everything about it. Perfect no Mod-Podge napkin decoupage project


If you enjoyed this project make sure to check another cool way to decoupage with fire! All details HERE. Fun napkin decoupage for beginners too.
Make sure to check video below

Please Save This To Pinterest or Share on Social Media
Friends, your shares are how this site grows and I am sincerely grateful. A quick share to Facebook or save to Pinterest allows me to bring more home decor projects and crafts to more home decor DIY lovers


